Land Rover Discovery: Identification Codes / Description and Operation
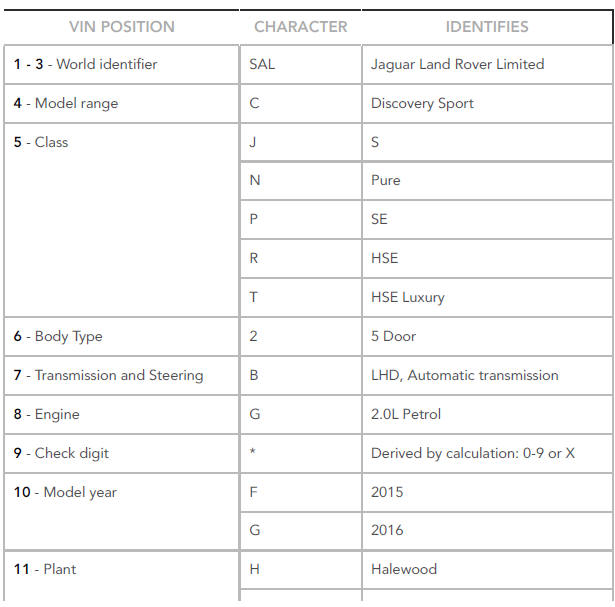
VEHICLE IDENTIFICATION NUMBER ( VIN )
NOTE:
Some variation in the illustrations may occur, but the essential information is always correct.
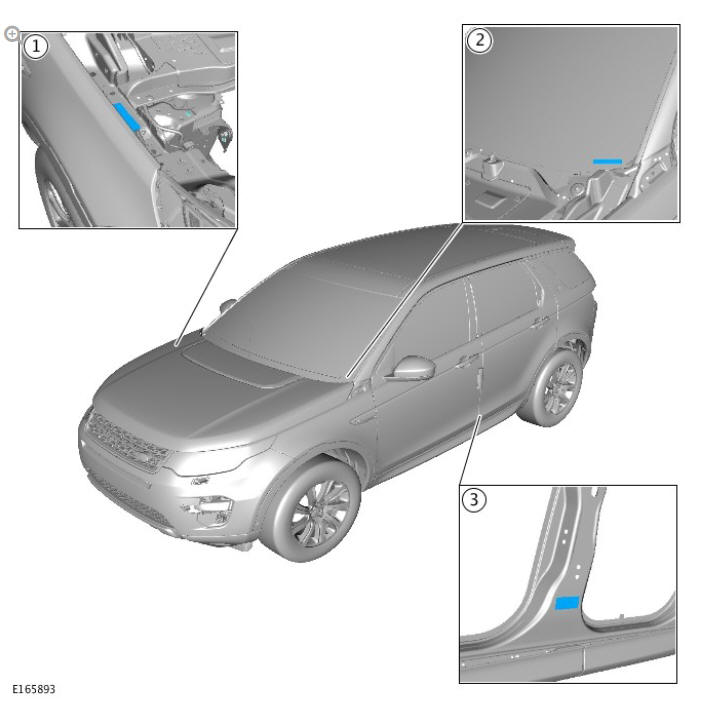
- VIN, stamped location
- VIN, Windscreen
- VIN Label
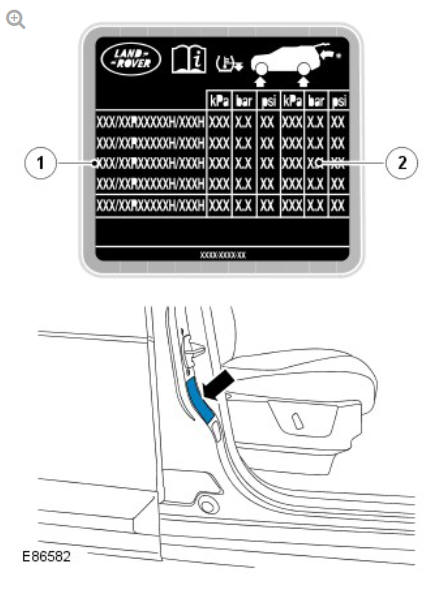
VIN Plate - UK, Europe and ROW
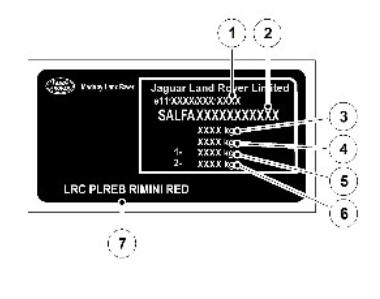
- Type/Approval Number - If shown
- VIN Number
- Gross Vehicle Weight
- Gross Combination Weight
- Front Axle Weight
- Rear Axle Weight
- Colour Code Group
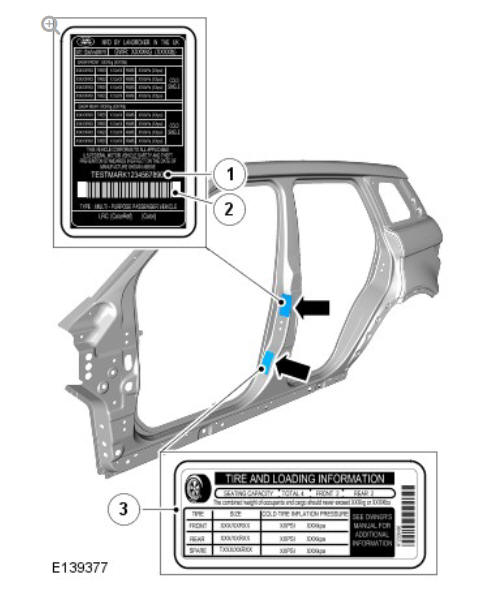
VIN Plate - China
- Vehicle VIN Number
- Engine Type/Capacity/Power
- Occupancy
- Build Date
- Gross Vehicle Weight
- Gross Trailer Weight
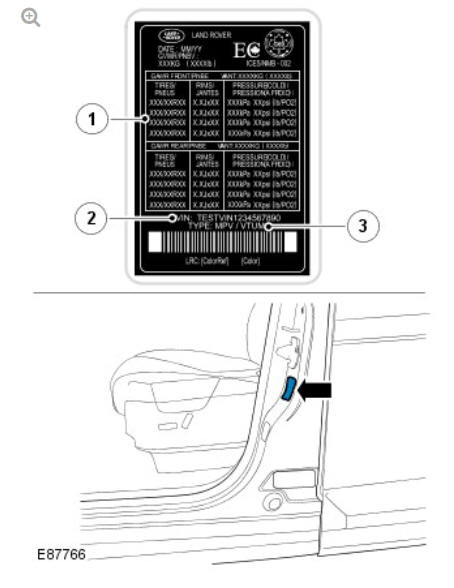
VIN Plate - Gulf markets
- Build Date
- Model year
- Vehicle VIN Number
TIRE DATA LABEL - UK , EUROPE AND ROW
- Tire Size
- Tire Pressures
CERTIFICATION / TIRE DATA LABEL - NAS ONLY
- Vehicle VIN Number
- Bar Code Identification
- Tire Pressures
TIRE PRESSURE LABEL - CANADA ONLY
- Tire Pressures
- Vehicle VIN Number
- Vehicle Type
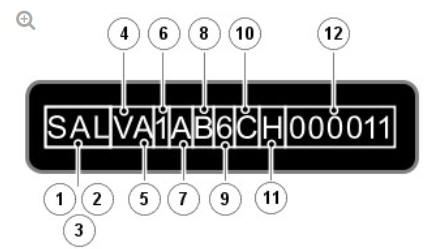
VIN NUMBER IDENTIFICATION
VIN number - UK, EU and ROW

2.2 LITER DIESEL ENGINE SERIAL NUMBER
The 2.2 Liter Diesel Engine Serial Number is stamped on the RH side of the cylinder block.
2 .0 LITER DIESEL ENGINE SERIAL NUMBER
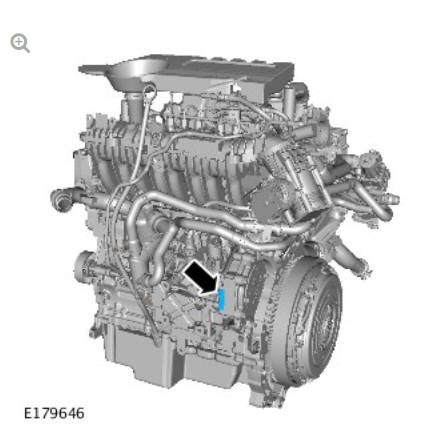
The 2.0 Liter Diesel Engine Serial Number is stamped on the RH side of the cylinder block.
2.0 LITER PETROL ENGINE SERIAL NUMBER
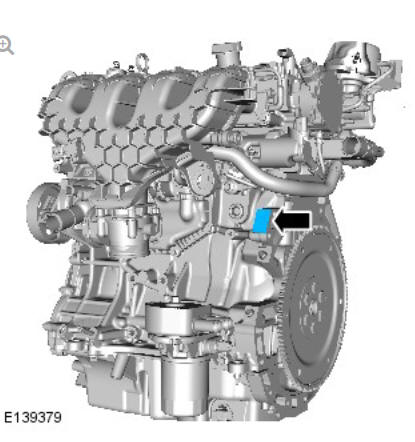
The 2.0 Liter Petrol Engine Serial Number is etched into the RH side of the engine block.
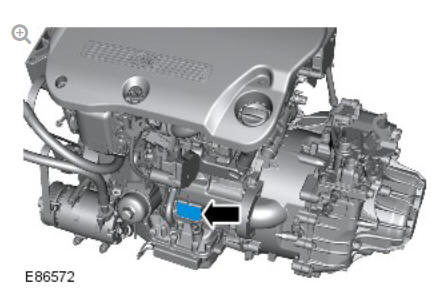
AUTOMATIC TRANSMISSION SERIAL NUMBER
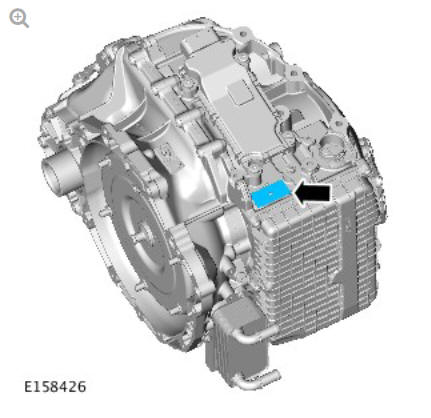
The Automatic Transmission Serial Number is stamped on the transmission casing.
MANUAL TRANSMISSION SERIAL NUMBER
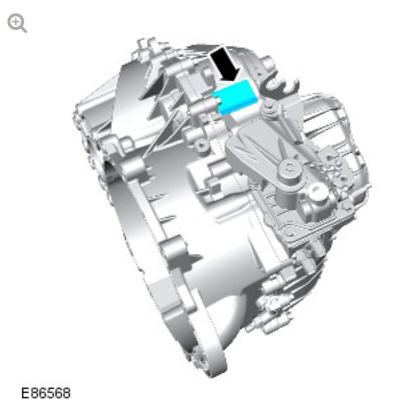
The Manual Transmission Serial Number is stamped on the transmission casing.
REAR DIFFERENTIAL SERIAL NUMBER
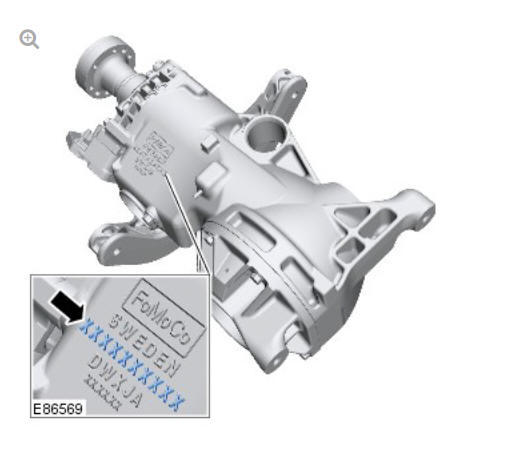
The Rear Differential Serial Number is stamped on the side of the differential casing.
POWER TRANSFER UNIT
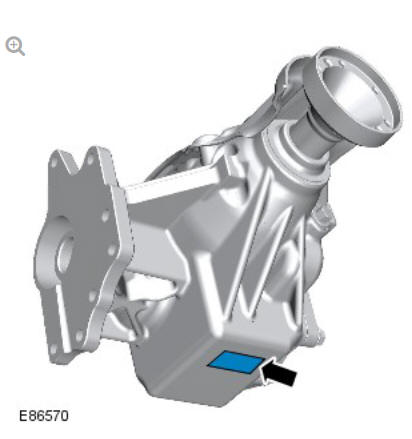
The number is stamped on the underside of the casing.
Important Safety Instructions
Safety Notice
Appropriate service methods and correct repair procedures are essential for the safe, reliable operation of all motor vehicles, as well as the safety of the person doing the work. This manual provides general directions for accomplishing service and repair work with tested effective techniques.
Following them will help assure reliability.
There are numerous variations in procedures, techniques, tools, and parts for servicing vehicles, as well as in the skill of the person doing the work.
This manual cannot possibly anticipate all such variations and provide advice or cautions as to each. Accordingly, anyone who departs from the instructions provided in the manual must first establish that neither personal safety or vehicle integrity is compromised from choices of methods, tools or parts.
READ NEXT:
 Jacking and Lifting - Jacking
GENERAL
WARNING:
The following instructions must be adhered to before raising the
vehicle off the ground:
Position vehicle on a solid, level surface.
Apply the parking brake.
Select 'P' - PARK on
Hydraulic Jack
WARNINGS:
Before commencing work on underside of vehicle, ensure that
axle
stands are correctly positioned and vehicle is securely supported.
Always chock the rear wheels when jacking the front
Raising the Rear of the Vehicle
All vehicles
WARNING:
Always chock the front wheels when jacking the rear of the vehicle.
Apply the parking brake.
Select 'P' - Park on automatic transmission selector.
Select 'N' - Neutral on manua
SEE MORE:
Front end Body Panels
Fender (G1780778) / Removal and
Installation
REMOVAL
NOTES:
Removal steps in this procedure may contain installation details.
LH illustration shown, RH is similar.
WARNING:
Make sure to support the vehicle with axle stands.
Raise and support the vehicle.
Refer to: Front Bumper Cover (501-19, Removal and Installation).
Torque: 4.1 Nm
Installing tether anchorage child restraints
Always follow the child seat or
restraint system manufacturer's
instructions when fitting tether
straps.
When fitting a child seat or
restraint system, always pass the
tether strap over the top of the
seatback and beneath the head
restraint.
If removing a head restraint in
order to fit a child restr
