Land Rover Discovery: Headlamp Washer Jet (G1780361) / Removal and Installation
Land Rover Discovery (2009–2016) Service Manual / Body / Wipers and washers / Headlamp Washer Jet (G1780361) / Removal and Installation
REMOVAL AND INSTALLATION
REMOVAL
NOTES:
- Removal steps in this procedure may contain installation details.
- Left shown, right is similar.
WARNING:
Make sure to support the vehicle with axle stands.
Raise and support the vehicle.
Refer to: Front Bumper Cover (501-19, Removal and Installation).
WARNING:
Carefully release either side of the component to avoid damage.
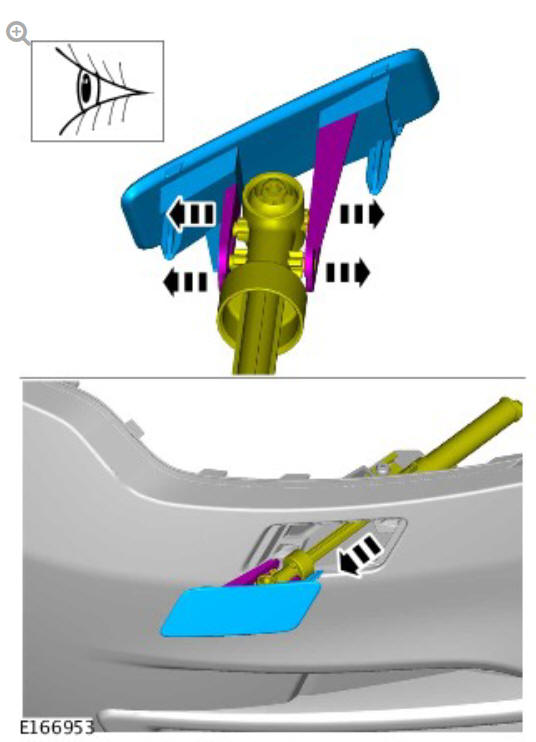

INSTALLATION
To install, reverse the removal procedure.
Headlamp washer pump (G1780366) removal and installation
REMOVAL
NOTE:
Removal steps in this procedure may contain installation details.
WARNING:
Make sure to support the vehicle with axle stands.
Raise and support the vehicle.
NOTE:
RH side only.
Refer to: Fender Splash Shield (501-02, Removal and Installation).
CAUTION:
Be prepared to collect escaping fluids.
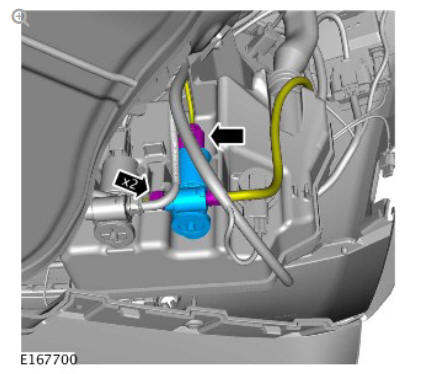
INSTALLATION
To install, reverse the removal procedure.
READ NEXT:
 Rain Sensor (G1780360) / Removal and installation
REMOVAL
NOTES:
Removal steps in this procedure may contain installation details.
Make sure the ignition is OFF at all times during the replacement
procedure.
Refer to: Interior Rear View Mirror (
Rear Window Wiper Pivot Arm (G1780367) / Removal and Installation
REMOVAL
NOTE:
Removal steps in this procedure may contain installation details.
NOTE:
Make sure that this component is installed to the noted
removal position.
Torque: 5.4 Nm
NOTE:
Do not disassem
Windshield Washer Reservoir (G1780365) / Removal and Installation
REMOVAL
WARNING:
Make sure to support the vehicle with axle stands.
Raise and support the vehicle.
Refer to: Front Bumper Cover (501-19, Removal and Installation).
Torque: 5 Nm
Torque: 4.1 Nm
To
SEE MORE:
Suspended Loads
CAUTION:
Never improvise lifting tackle.
There is always a danger when loads are lifted or suspended. Never work
under an unsupported, suspended or raised load, for example a suspended
engine.
Always make sure that lifting equipment such as jacks, hoists, axle stands
and slings are adequate and sui
Hydraulic Control Unit (HCU)
Anti-lock Brake System (ABS) control module
Secondary circuit port
Left front caliper port
Right front caliper port
Primary circuit port
Left rear caliper port
Right rear caliper port
Hydraulic Control Unit (HCU)
The Hydraulic Control Unit (HCU) is located on the rear left side of the
en
© 2019-2025 Copyright www.lrdisc.com
