Land Rover Discovery: Cylinder Head Gasket (G1875895) / Removal
PART(S)
.jpg)
REMOVAL
NOTES:
- Some variation in the illustrations may occur, but the essential information is always correct.
- Some components shown removed for clarity.
WARNING:
Make sure to support the vehicle with axle stands.
Raise and support the vehicle.
Refer to: Specifications (414-01 Battery, Mounting and Cables, Specifications).
Refer to: Engine Oil Draining and Filling (303-01B Engine - INGENIUM I4 2.0L Diesel, General Procedures).
Refer to: Cooling System Draining, Filling and Bleeding (303-03B Engine Cooling - INGENIUM I4 2.0L Diesel, General Procedures).
Refer to: Valve Cover (303-01B Engine - INGENIUM I4 2.0L Diesel, Removal and Installation).
Refer to: Engine Mount (303-01B Engine - INGENIUM I4 2.0L Diesel, Removal and Installation).
Refer to: Intake Manifold (303-01B Engine - INGENIUM I4 2.0L Diesel, Removal and Installation).
Refer to: Exhaust Manifold (303-01B Engine - INGENIUM I4 2.0L Diesel, Removal and Installation).
.jpg)
.jpg)
.jpg)
CAUTION:
Care must be taken not to damage the component.
.jpg)
CAUTION:
Remove and discard the O-ring seals.
.jpg)
CAUTION:
Discard the component
.jpg)
CAUTIONS:
- Make sure that the components are clean, dry and free from corrosion and foreign material.
- Check all timing components for wear and install new components if required.
NOTE:
Mark each camshaft roller follower and lash adjuster. Make sure each component is returned to its original fitted position.
.jpg)
.jpg)
CAUTION:
Discard the bolts.
.jpg)
CAUTIONS:
- Take extra care not to damage the edges of the component.
- Take extra care not to damage the surrounding components.
.jpg)
NOTE:
Discard the gasket.
.jpg)
CAUTION:
Make sure that the dowels and dowel holes are clean and free from debris and foreign material.
.jpg)
CAUTION:
Only use a plastic scraper to clean off the old gasket.
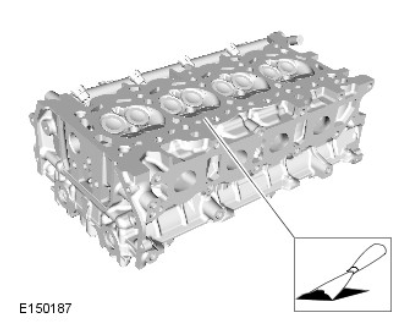
Clean and inspect the cylinder head and cylinder block.
READ NEXT:
 Cylinder Head Gasket (G1875895) / Installation
INSTALLATION
Check cylinder head face for distortion, across the center and from
corner to corner.
CAUTION:
Make sure that the dowels and dowel holes are clean and
free from debris and foreign mater
Engine - Ingenium i4 2.0l Diesel Engine (G1880413) Removal
REMOVAL
SPECIAL TOOL(S)
GENERAL EQUIPMENT
Engine hoist (1 tonne minimum capacity)
CAUTION:
Make sure that all openings are sealed. Use new blanking caps.
NOTES:
In this procedure the EU6 Exhaust
SEE MORE:
Reversing Lamps
PRINCIPLES OF OPERATION
For a detailed description of the Reverse Lamps, refer to the relevant
Description and Operation section in the workshop manual. REFER to:
Exterior Lighting (417-01 Exterior Lighting, Description and Operation).
INSPECTION AND VERIFICATION
CAUTION:
Diagnosis by substitution f
Glass, Frames and Mechanisms
- Description
WINDOW SWITCHES
Driver Door Switchpack
Passenger Door Switchpacks
Individual window switches are installed in each of the three passenger
doors. Window switches for all of the windows and a rear window isolation
switch are installed in the driver door switchpack in the top surface of the
door tr
