Land Rover Discovery: Storage compartments - accommodation
Land Rover Discovery (2009–2016) Owner's Manual / Storage compartments / Storage compartments - accommodation
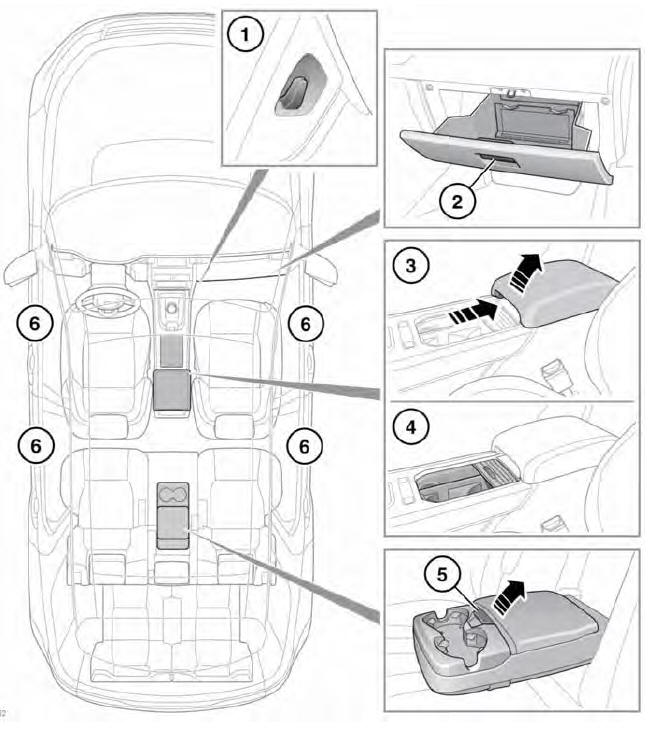
- Bag hook.
- Glovebox: Pull the handle to open.
- Armrest and cubby box: Pull the release lever and then raise the armrest to access the storage area.
To avoid personal injury, keep hands and fingers clear from the front and rear edges of the armrest during the opening and closing of the cubby box.
- Cup holders: Slide back the cover to reveal the cup holders.
Do not drink, or use the drinks holders when driving.
- Rear armrest storage and cup holders: Press the release button to access the storage compartment.
- Storage areas.
Make sure that any items stored in the vehicle are secure and cannot move. If the vehicle is involved in an accident, or subject to a sudden braking or direction change, loose items can cause serious injury.
READ NEXT:
 Auxiliary power sockets
There are 12V power sockets and 5V USB
charge sockets fitted to this vehicle.
Remove the cover to access a 12V power
socket.
Note: The 12V power sockets can be used
to power approved accessories th
Loadspace cover
LOAD CARRYING
Never allow passengers to travel
in the loadspace under any
circumstances. All vehicle
occupants should be seated
correctly and wear a seat belt at
all times when the vehicle is i
SEE MORE:
Wipers and Washers Control Switch - Description
Vehicles with rain/light sensor - Automatic rain sensing
selected/intermittent wipe
selected if sensor disabled in IC menu or Vehicles without rain/light sensor
-
Intermittent wipe selected
Vehicles with rain/light sensor - Automatic rain sensing sensitivity
adjustment/intermittent delay
Touch screen controls
Do not adjust the Touch screen
controls, or allow the system to
distract the driver, while the
vehicle is moving.
Always run the engine during
prolonged use of the Touch screen.
Failure to do so may discharge the
vehicle's battery; preventing the
engine from starting.
Avoid spilling or splashing
© 2019-2026 Copyright www.lrdisc.com
